I made a strange thing in a day. Actually it’s hard to tell how long it took to make. It’s taken me days…weeks, because I wasn’t using someone else’s plans or drawings or instructions or a kit. I was using scrap materials that have been sitting in my garage or in my yard. They’ve been sitting there for years. So maybe it’s taken me years to make this strange thing.
It took weeks of imagining it and reimagining it, reimaginings based on reconsiderations of materials at hand. The only thing I bought for this project was some wood glue, which a person should have around the house anyway, right? A few days ago, or maybe it was two weeks ago, I set up the sawhorses and the platform on which this object would be built, and I painted the main trunk. Then one morning I decided it was time to pull the trigger, as they say—in this case, the trigger on a power drill. Within an hour I had “finished” it in the sense that I believed that all was left to do was to let the glue dry and then paint the base. So it wasn’t finished finished, but it was close enough that there should be no more delays.
It made me laugh out loud when I took a step back and looked at it.
It looked a mess. And a bit of it came undone within an hour of its “first completion.”
It is supposed to be a roosting tree for the chickens I am chicken-sitting this summer.
What did I learn?
Never rush anything. I could’ve cut the base’s four pieces to be more uniform. I could’ve put them together one at a time so that each piece was tightly bound by both glue and a screw to another piece before the third (and fourth) pieces were attached. That would’ve been trickier and taken days (to allow for the glue’s drying time) rather than a mere hour.
Use appropriate material, i.e., the right screw. Just because a screw is labeled “outdoor” and is the longest screw you have in the garage, doesn’t mean it is the right screw for the job. But then, maybe it was the right screw for the job because…well, see Lesson #3.
Preparations are worth it, i.e., drill a proper pilot hole. Really this is a subset of Lesson #1. Because I didn’t take my time and drill a pilot hole that went through both pieces of wood, the screws wouldn’t go all the way into the 2x4s. I contemplated simply cutting off the excess screw length, because, as was implied in Lesson #2, the screws were longer than needed. And there’s glue between these pieces, so that’ll hold, right?
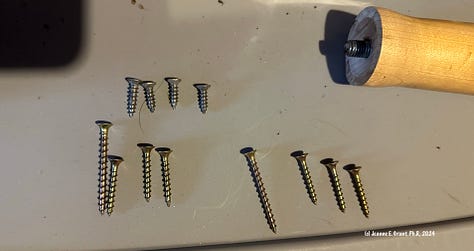
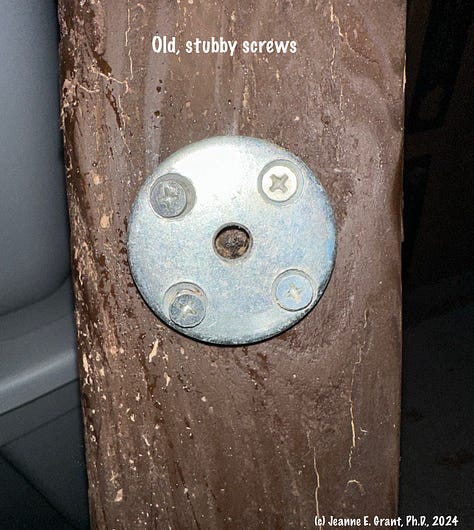
Substitute as needed. From an IKEA chair that had broken, I had saved the legs and their hardware (carefully in a little plastic container so they were ready and accounted for), which consists of metal plates and screws. These stubby screws, however, were designed for chair legs, not chicken perches, which will bear weight in a completely different direction, as in a ninety-degree different direction. Longer screws were needed here. One of the chicken perches formerly known as a chair leg was the bit that had fallen off within the hour.
What did I fix in the afternoon?
I didn’t change anything about the base. The pieces are still not uniform and I still have to paint the base. (It was too windy to paint.) Once the glue dried, it was solid enough, but when I assembled everything together in the back yard, the base was not quite the right size. This roosting tree turned out very wobbly. So I stuck a couple wedges in. It still wobbles. The trunk is a 4x4 post, so eventually I think it can be stuck into the ground and the base repurposed. Or maybe I can create the original base I had imagined, which might require purchasing a couple pieces of hardware.
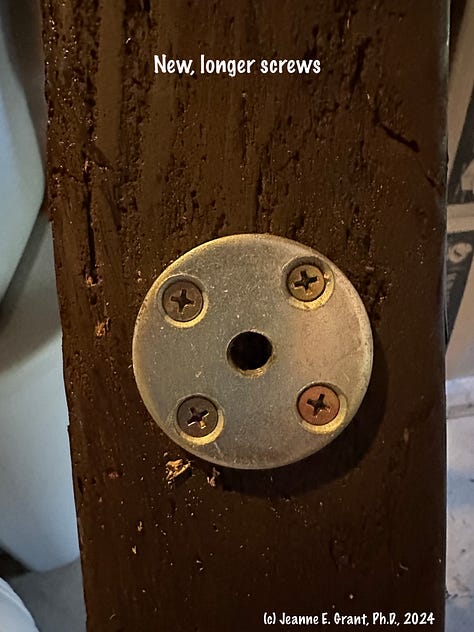
I did change the screws holding the chicken perches formerly known as chair legs in the trunk—from the little stubs who could hold chair legs to much lengthier wood screws who should be able to hold up one or two chickens on a perch. (See photos.)
Why did I think making this was a good idea?
Chickens are curious and social animals and I thought if they had a mobile perching tree, they could see far and wide from different locations and see wondrous things. They, for example, could look in the window(s) of their caretaker’s house. I wanted to be able to move it around, so I tried to make it self-standing. I wanted it to be able to travel with the chickens, so I tried to make it disassemble-able, or collapsable, hence I used the old IKEA chair legs. The chair legs had screwed not into the wood of the chair seat but into metal hardware, so they were absolutely meant to be disassembled and reassembled.
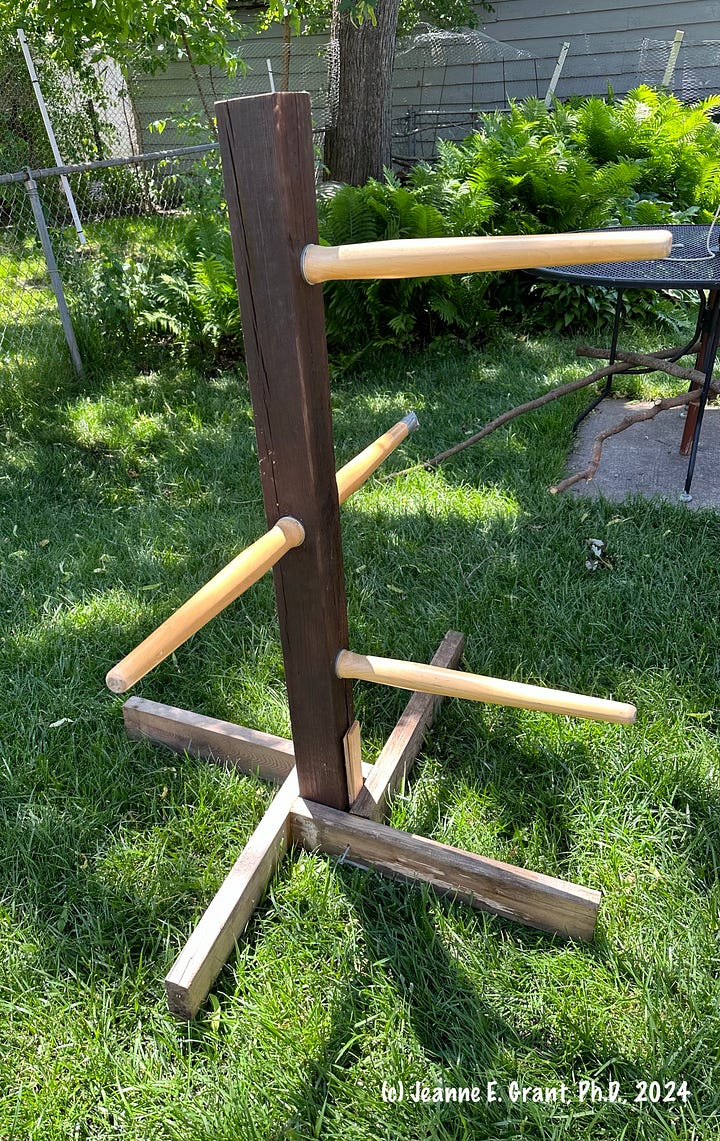
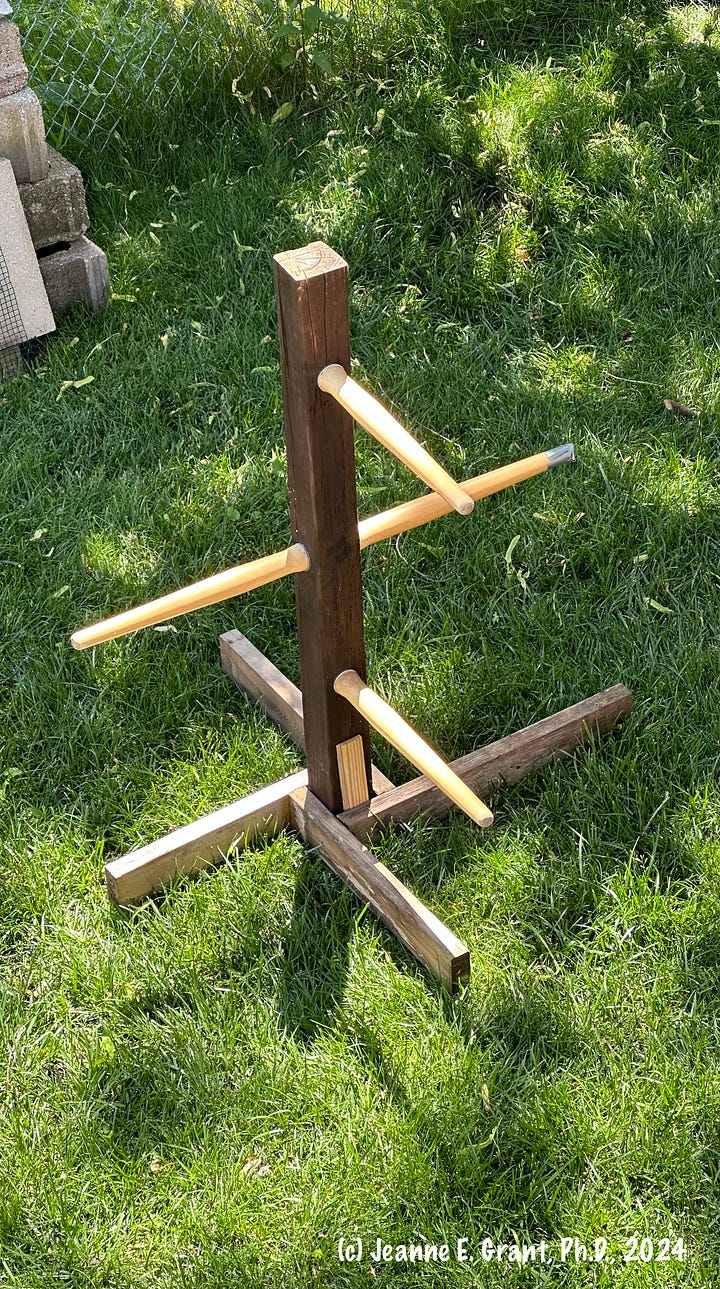
And finally, the most important question, why did I put the perches on only three sides of the trunk?
I don’t know. I was thinking of attaching natural branches to the fourth side, but that’s really not looking likely. As I stare at it now, reimagining continues and I think, “this could be a post in a chicken-yard fence. The fourth side would have chicken fence attached to (and the next post, etc., etc.). It’s brilliantly perfect.”
Its second completion is complete. It’s finished finished, until I decide to do something else with or to it. If the chickens are brave enough to perch on it, I’ll report back.
Next time, though, I’m thinking a roost that looks like an A-frame or a ladder. Luckily I have three more IKEA chairs and I’ll just have to wait for them to break.
Pledges to A Good Spot
Please, consider pledging to this substack, A Good Spot, as it would be greatly encouraging and well, simply, AWESOME. (Pledging is not paying right away; a subscriber pledges to become a paid subscriber if and when I turn on paid subscriptions, which I don’t plan to do for a long while. When I do, every thin dime will go directly to rescued animals.) Click here to learn more about A Good Spot.


“A” for effort! Look at how much you learned without wasting. I could hear the wheels turning and churning for project #2! I have my money on chicken curiosity and a new photo for your post!